Saturday 15 December 2012

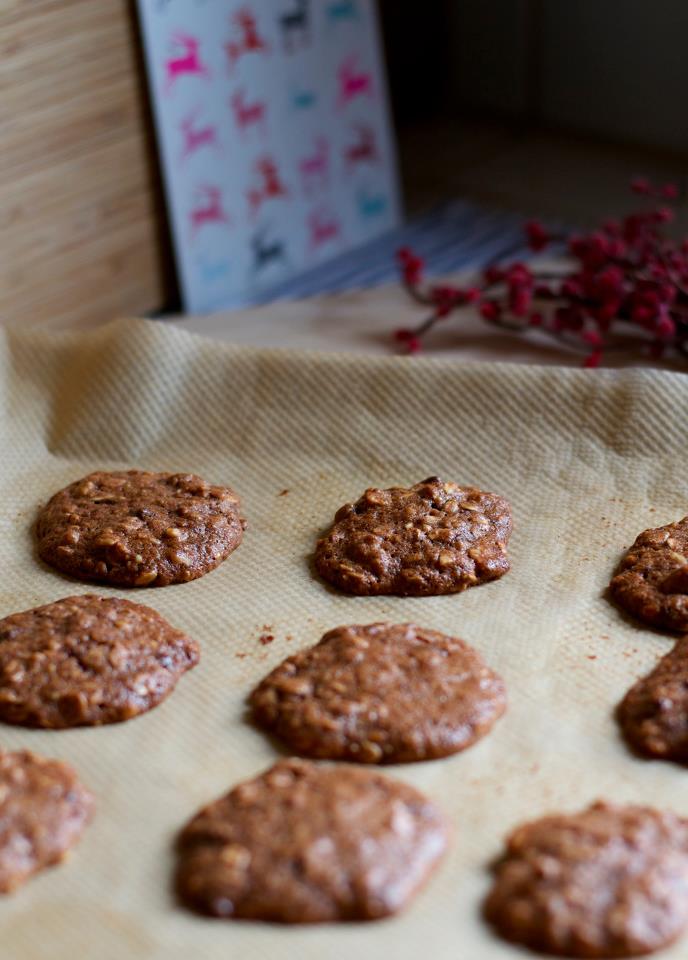
chocolate chip cookies with almonds and oats

Recipe: Chocolate chip cookies with almonds and oats · Kitchen & Aroma


I have to admit that it was my plan to post more recipes on the blog before the holidays but somehow other things got in the way. Let me make it up with cookies. I was baking with my kids on Thursday when I decided to do a little experiment and this recipe is the result. I baked the cookies again yesterday just to make sure that our taste buds hadn't been fooling us and they were just as good. My kids don't like dark chocolate so I use organic semi sweet chocolate in mine. You can also use organic milk chocolate if you want. And if you want to use more chocolate then that is fine too, just make sure you don't overdo it because the cookies are sugary enough.

CHOCOLATE CHIP COOKIES WITH ALMONDS AND OATS

INGREDIENTS

  • 1 large egg
  • 70 g raw cane sugar, organic
  • 2 tablespoons agave nectar
  • 2 tablespoons organic peanut butter
  • 2 tablespoons coconut oil
  • 30 g spelt flour
  • ½ teaspoon gluten free baking powder
  • ½ teaspoon fine sea salt
  • 2 teaspoons cocoa powder
  • 50 g rolled oats
  • 70 g almonds, chopped
  • 70 g organic chocolate, semi sweet or dark, chopped

METHOD

  1. In a large bowl, combine the egg, sugar, agave nectar, peanut butter and coconut oil (if the oil is solid, place the jar in a bowl of hot water before use)
  2. In a small bowl, combine the spelt flour, baking powder, salt and cocoa powder and add it to the wet ingredients
  3. Add the rolled oats and chopped almonds and mix gently (I chop the almonds in a food processor)
  4. Chop the chocolate, add it into the bowl and mix gently
  5. Place baking parchment on a large baking tray
  6. Drop a tablespoon of batter onto the baking parchment and make sure to leave some space between each cookie. I get about 24 cookies from the batter and bake 12 at a time
  7. Bake at 180°C/350°F/gas mark 4 for 12 minutes
  8. The cookies are soft when they come out of the oven so allow them to cool for a few minutes before transferring them to a wire rack to cool further or serving

Tuesday 2 October 2012

carrot muffins


Is it obvious that I like baking muffins? I have plenty of muffins recipes in my notebook and every time I think about what to post there is this voice inside that says no, you cannot post yet another muffins recipe. I find it a bit funny that in early 2009 I had never in my life baked muffins. I have no idea what was stopping me but after my first try there was no going back. My friend (Cafe)Sigrun was of course my inspiration; she was always talking about these amazing muffins she was making and one day I thought to myself that's it, now I'll give it a go and I went muffin pan shopping. I'm not pretending to invent the wheel with this recipe, I think the ingredients are pretty basic, but as you know I never use butter when baking and I don't drown my recipes in oil. Personally, I love using chopped pecans or walnuts in carrot muffins but my younger daughter is going through a phase where she doesn't want nuts in anything (too long phase, if you ask me!). As I like to make these for the children I leave the nuts out.

CARROT MUFFINS

INGREDIENTS

  • 250 g spelt flour, a blend of wholegrain and fine (2 cups)
  • 2½-3 teaspoons gluten free baking powder
  • ½ teaspoon fine sea salt
  • 1-1½ teaspoon ground cinnamon
  • ½-1 teaspoon ground ginger
  • ½ teaspoon freshly ground nutmeg
  • optional: ⅛-¼ teaspoon cardamom
  • optional: ⅛-¼ teaspoon clove
  • 1 large egg, free-range/organic
  • 100 g organic raw cane sugar (½ cup)
  • 2 tablespoons pure maple syrup or agave
  • 1 tablespoon coconut oil or other fine vegetable oil
  • 75-90 ml (5-6 tablespoons) organic vanilla yoghurt (or plain yoghurt + ¼-½ teaspoon organic vanilla sugar)
  • 175 g coarsely grated carrots (two carrots)

Update 4 October 2012: I was asked in an email how I make these with nuts. Usually, I use chopped walnuts and I use about 50 grams, which is about ½ cup. And when I use nuts I only use ½ tablespoon of oil because the fat from the nuts is enough. The muffins get too sticky in my opinion if I use 1 tablespoon.

METHOD

  1. In a large bowl, combine the spelt flour, baking powder, salt, and spices. Set aside
  2. In a medium bowl, combine the egg, sugar, maple syrup and coconut oil (if the oil is solid, place the jar in a bowl of hot water before use). Then add the vanilla yoghurt and combine
  3. Coarsely grate the carrots
  4. Add the wet ingredients and the grated carrots (and walnuts if using) into the large bowl and mix gently. Make sure not to stir, the texture of the dough should be rather light
  5. Lightly grease a silicon muffin pan with some coconut oil and fill each muffin cup about two-thirds to the rim (makes 12-14 muffins)
  6. Bake at 180-190°C/350-375°F/gas mark 4-5 for 20-25 minutes (fan oven: 175°C/325°C/gas mark 3)
  7. Remove the muffins from the oven and allow them to cool in the tins for about 5 minutes before transferring to a wire rack

Thursday 6 September 2012

couscous salad with lime dressing


This simple and easy to make salad has been quite often on the menu this summer, or since we got back from a short trip to London in June. I bought a couscous salad in the Whole Foods Market on Kensington High Street to eat on the way back home and it tasted so delicious that I decided to use it as an idea for my own summer salad. This is one of my experiments and, in fact, I'm enjoying it while creating this post. The salad I bought was quite different and it had chickpeas in it but my experiments started with kidney beans and pinto beans. Actually, the only time we found it dull was when I used chickpeas. Maybe it needed to sit longer before serving, I don't know. It just didn't taste the same. As I said, it's easy to make so I like having it for lunch and then I use the rest as a side dish with dinner that same day. It goes really well with chicken and all kinds of grilled meat. There are many types of couscous available on the market, I use organic one from Rapunzel.

COUSCOUS SALAD WITH LIME DRESSING

INGREDIENTS

SALAD

  • 200 g organic couscous (1 cup)
  • 300 ml water (250 ml = 1 cup)
  • 1 can kidney beans (400 g)
  • 100 g sweetcorn (½ cup)
  • 1 red pepper, diced
  • 1 orange, diced
  • optional: ½ red onion, finely chopped

DRESSING

  • 3-3½ tablespoons freshly squeezed lime juice (you will need two limes)
  • 1½-2 tablespoons extra virgin olive oil
  • 1 teaspoon Himalaya or sea salt
  • ½ teaspoon garam masala
  • ½ teaspoon ground cardamom
  • ¼ teaspoon turmeric

METHOD

SALAD

  1. Start with preparing the couscous which is very simple: Put couscous and water into a small saucepan, bring to boil (happens fast), remove immediately from heat, cover with lid and let it sit for about 10-15 minutes
  2. Rinse and drain the beans and sweetcorn and keep them in a colander until ready to use (I use organic sweetcorn that I buy in glass jars)
  3. Remove the seeds and dice the red pepper
  4. Peel the orange with a sharp knife and try to remove all the pith. Cut the orange in half and dice it (make sure you are using a good and tasty orange)
  5. If using the half red onion, peel it and chop finely (I recommend it for the salad as it adds a good taste)
  6. Put all the ingredients into a big salad bowl and mix together

DRESSING

  1. Whisk together the lime juice, olive oil, salt and spices
  2. Drizzle some of the dressing over the salad and mix together, repeat two or three times until you have used up all the dressing
  3. Leave the salad to stand for about 10 to 20 minutes while the flavours are developing
  4. Serve as a main course with bread or as a side dish with, for example, grilled meat

Please note, do not keep the orange or limes in the fridge before preparing the salad. In an airtight container you can keep the salad in the fridge for 2-3 days.

Tuesday 10 July 2012

Rhubarb and strawberry crumble

© Lisa Stefan | Books & Latte
Please find the rhubarb and strawberry crumble recipe on my blog Books & Latte (follow the link).

Tuesday 5 June 2012

mixed seed bread with thyme and rosemary


I using yeast?!! This is what happened. I haven't used yeast for about three years or so, not because I have anything against it, I simply find it more convenient to bake bread with gluten-free baking powder that is ready for the oven as soon as the dough has been mixed. Last week my husband went grocery shopping and on the list was baking powder. In the health food section it is next to the yeast so he simply grabbed the wrong thing. He bought a few packages and instead of returning it I decided to experiment a little with bread recipes. This is one of my results and it looks like I'll be buying more yeast in the future. If you buy dry yeast in the health food section it will contain nothing but fresh yeast that has been dried. The package I use contains 9 grams and is intended for 500 grams of flour. It's a quick yeast which means that you don't have to mix it with water or anything like that, you simply blend it with the ingredients and let the dough rise before moulding a loaf that goes straight into the oven. Most yeast bread recipes will tell you to knead the dough for several minutes but I find it best to knead it as little as possible (maybe it's because I use spelt flour). I make two medium sized loafs from the dough.

MIXED SEED BREAD WITH THYME AND ROSEMARY

INGREDIENTS

  • 500 g spelt flour (4 cups*)
  • 1 package dry yeast (9 g) - see description above
  • 1 teaspoon fine sea salt
  • ½ tablespoon raw cane sugar, organic
  • ½ tablespoon flaxseeds/linseeds
  • ½ tablespoon pumpkin seeds
  • ½ tablespoon sesame seeds
  • ½ tablespoon sunflower seeds
  • 1 teaspoon dried thyme
  • ¼ teaspoon dried rosemary
  • 150 ml hot water
  • 125 ml soya milk or regular (½ cup)
  • 1 tablespoon virgin olive oil or other quality vegetable oil

* American readers please note: 500 grams of spelt flour is about 4 cups minus 3 tablespoons. 1 cup = 250 ml

METHOD

  1. Combine all the dry ingredients in a large bowl using a large wooden spoon or a spatula
  2. Boil some water and then blend the water, milk, and oil in a measuring cup. Slowly pour it into the bowl while mixing the dough gently with the spoon
  3. Use one hand to gently knead the dough while it is still in the bowl. If there is still some dry flour on the bottom of the bowl that doesn't mix then add 1-2 tablespoons of water and knead the dough a little more. Make sure the dough is not sticky (at this stage I keep the dough in the bowl while kneading it)
  4. Put a lid on the bowl or cover it with a tea towel and let the dough rise for about 45 minutes in a draught-free spot
  5. Line a baking tray with baking parchment. Divide the dough in half and gently knead each half on a lightly (spelt)floured working surface. I start with making a ball and then I slowly begin spreading it a little and rolling it back and forth. The size of the loafs I mould is about 10 x 22 cm (4 x 8.7 inches)
  6. Bake at 200°C/400°F/gas mark 6 for 20-22 minutes


Tuesday 22 May 2012

oven braised artichokes with garlic & thyme


I found this recipe on the wonderful food blog Gourmande in the Kitchen, written by Sylvie Shirazi. With the artichokes in season they are everywhere and I was beginning to crave them. I didn't really make any changes, added a bit of garlic and used less oil. I took the photos when I was experimenting with skipping the white wine, so they look less cooked if you compare them with the photos of the original recipe. I wanted to taste them without the wine, just to see how it would work, and I must say that they tasted really good. The recipe with the white wine is, of course, delicious. If you have never cooked artichokes before then I dare you to try it, it's not as difficult as some would think and when you take that first bite it's quite rewarding.

OVEN BRAISED ARTICHOKES WITH GARLIC AND THYME

INGREDIENTS

  • 45 ml extra virgin olive oil (3 tablespoons)
  • 60 ml freshly squeezed lemon juice (1/4 cup)
  • peel from one lemon
  • 60 ml good quality/organic white wine or water (1/4 cup)
  • sprigs of fresh thyme
  • 2 bay leaves
  • 3-4 garlic cloves, chopped
  • 1 teaspoon fine sea salt
  • 1/2 teaspoon freshly ground pepper
  • 4 large artichokes
  • for garnishing: 2 tablespoons fresh flat leaf parsley, finely chopped

METHOD

  1. In a large roasting pan, combine all the ingredients except the artichokes
  2. Pull off and discard the thick outer leaves of the artichokes by bending them back and pulling them down toward the stem. (Remove leaves that are dark green, but do not remove leaves that are green at the top and yellow on the bottom.)
  3. Snip off the tops of the leaves (at the point where the green and yellow come together) and trim around the base of the artichoke heart to smooth the sides and peel the stem
  4. Cut the artichoke in half and scoop out the fuzzy choke with a small spoon. As each artichoke heart half is completed, add it to the roasting pan with the braising liquid, turning it to coat completely and prevent browning
  5. Cover the pan with a lid or parchment lined aluminium foil and cook in the oven on 200°C/400°F/gas mark 6 for 30-40 minutes, until the hearts are tender when pierced with a knife [I cooked them in the oven for exactly 40 minutes]
  6. Remove the pan from the oven, uncover, and let the artichokes cool in the braising liquid
  7. Garnish with chopped parsley [I skipped that step], serve warm, or refrigerate and serve chilled

Thursday 8 March 2012

apple and cinnamon muffins - 'appins'

Recipe: Apple and cinnamon muffins - 'appins' · Kitchen & Aroma


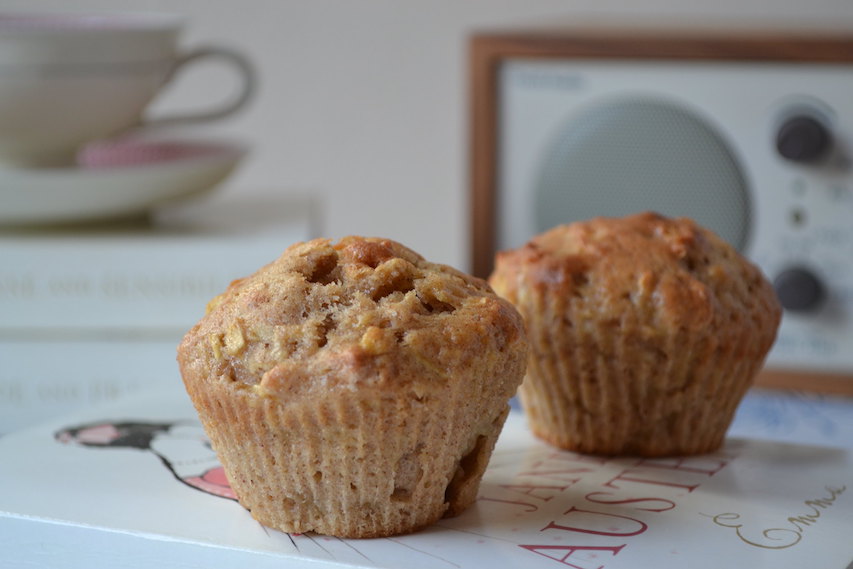
I have a confession to make; these are my I-need-to-manipulate-my-hubby muffins. If I don't have time to bake his favourite, the apple cake, then I can always make these, as the recipes are similar, and have my way with him. Well, sort of, he's not that easily manipulated! By the way, he calls these appins. All jokes aside, these muffins are very easy to make and if I remember correctly I put the recipe together for a Sunday brunch. Everyone in this household finds them delicious and I make them frequently. I always use one teaspoon of cinnamon and I don't think the taste is too dominant. Use less if you're sensitive to its taste. I have added a few baking options below the list of ingredients if you would like to pop them up. If using regular baking powder one teaspoon is enough.

APPLE AND CINNAMON MUFFINS

INGREDIENTS

  • 200 g spelt flour (1½ cup)
  • 2 teaspoons gluten-free baking powder
  • ½ teaspoon fine sea salt
  • ½-1 teaspoon ground cinnamon
  • 1 large egg, free-range/organic
  • 1 egg white (from a large egg)
  • 100 g organic raw cane sugar (½ cup)
  • 2 tablespoons pure maple syrup
  • 1 tablespoon coconut oil
  • 2 large red apples, peeled and grated coarsely

Optional: You can use less cinnamon and/or add some ground ginger or nutmeg instead, or both. Sometimes I add a handful of chopped pecans and I have used raisins. If you really want to treat yourself then add 20 g of chopped organic dark chocolate and skip one tablespoon of maple syrup.

METHOD

  1. In a medium bowl, combine the spelt flour, baking powder, salt and ground cinnamon. Set aside
  2. In a large bowl, combine the egg, egg white, sugar, maple syrup and coconut oil (if the oil is solid, place the jar in a bowl of hot water before use)
  3. Peel the apples and remove the seeds. Grate the apples using a coarse grater and then add them to the egg and sugar blend and mix with a spatula
  4. Add the dry ingredients and mix gently. Make sure not to stir, the texture of the dough should be light
  5. Lightly grease a silicone muffin pan with some coconut oil and fill each muffin cup about two-thirds to the rim (makes 12 muffins)
  6. Bake at 200°C/400°F/gas mark 6 for 22-25 minutes
  7. Remove the muffins from the oven and allow them to cool in the tins for about 5 minutes before transferring them to a wire rack

Saturday 4 February 2012

hot chocolate with home-made vanilla sugar

Can anyone resist the temptation of a cup of hot chocolate in cold weather? This blend is my children's favourite and it's so easy to throw everything into a saucepan after school on cold days. I don't melt any chocolate to make this one; I just use organic cocoa powder and home-made vanilla sugar. The taste is sweet and you don't really need to serve it with whipped cream/ice cream. Personally I like my hot chocolate with a stronger chocolate taste, even chilli powder, and of course you can add more cocoa powder or bits of organic dark chocolate to get the desired taste. Or maybe pouring some liquor into the cup will do. wink

HOT CHOCOLATE WITH HOME-MADE VANILLA SUGAR

INGREDIENTS

  • 1 litre milk (4 cups)
  • 2 tablespoons raw cane sugar
  • ½ tablespoon home-made vanilla sugar
  • 3 tablespoons cocoa powder, preferably organic
  • optional: pinch of sea salt 

METHOD

  1. Warm the milk in a saucepan on medium heat
  2. Add the sugar and cocoa powder and salt, if using, and whisk gently until the cocoa powder has dissolved
  3. Bring to an easy boil while you stir and then remove from heat
  4. Serve with or without whipped cream

HOME-MADE VANILLA SUGAR

I posted my version of home-made vanilla sugar in a separate post on this blog but I add it here for convenience. It's very easy to make, you only need organic raw cane sugar and one vanilla pod.

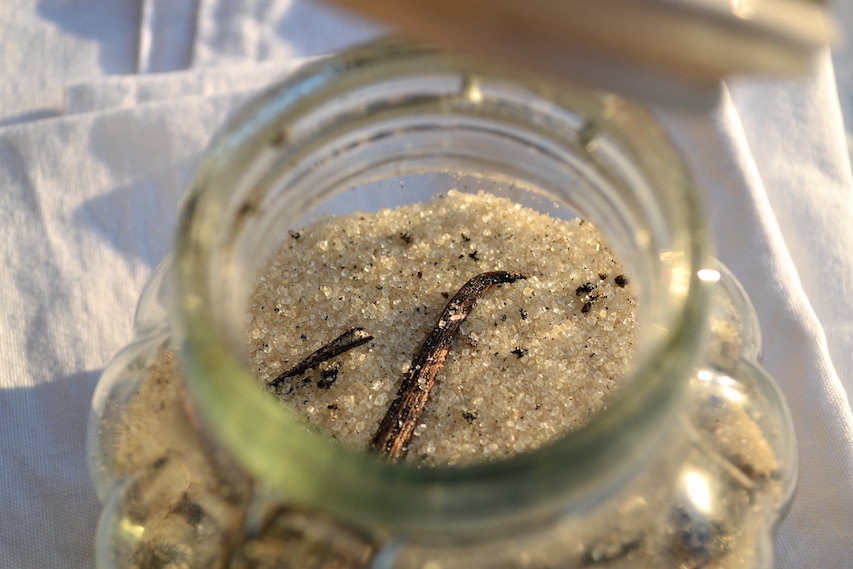
I split the vanilla pod lengthwise with a sharp knife. Then I scrape the seeds out with the knife tip. In a glass jar with a lid, I put organic raw cane sugar, all the seeds from the vanilla pod and the split pod itself. (Store in a closed jar.) You don't have to use all the seeds if you don't want too, in fact you don't need to use any. But I like my version with all the seeds.

home-made vanilla sugar

Recipe: Home-made vanilla sugar · Kitchen & Aroma


Someone emailed me and asked how I make my own vanilla sugar. It's very simple. Here is my version:

HOME-MADE VANILLA SUGAR

INGREDIENTS

  • organic raw cane sugar
  • 1 vanilla pod

METHOD

  1. Split the vanilla pod lengthwise with a sharp knife and scrape the seeds out with the knife tip
  2. In a glass jar with a lid, put organic raw cane sugar, all the seeds from the vanilla pod, and the split pod itself. You don't have to use all the seeds if you don't want too, in fact you don't need to use any. But I like my version with all the seeds
  3. Store in a closed jar, occasionally replacing the vanilla pod/seeds
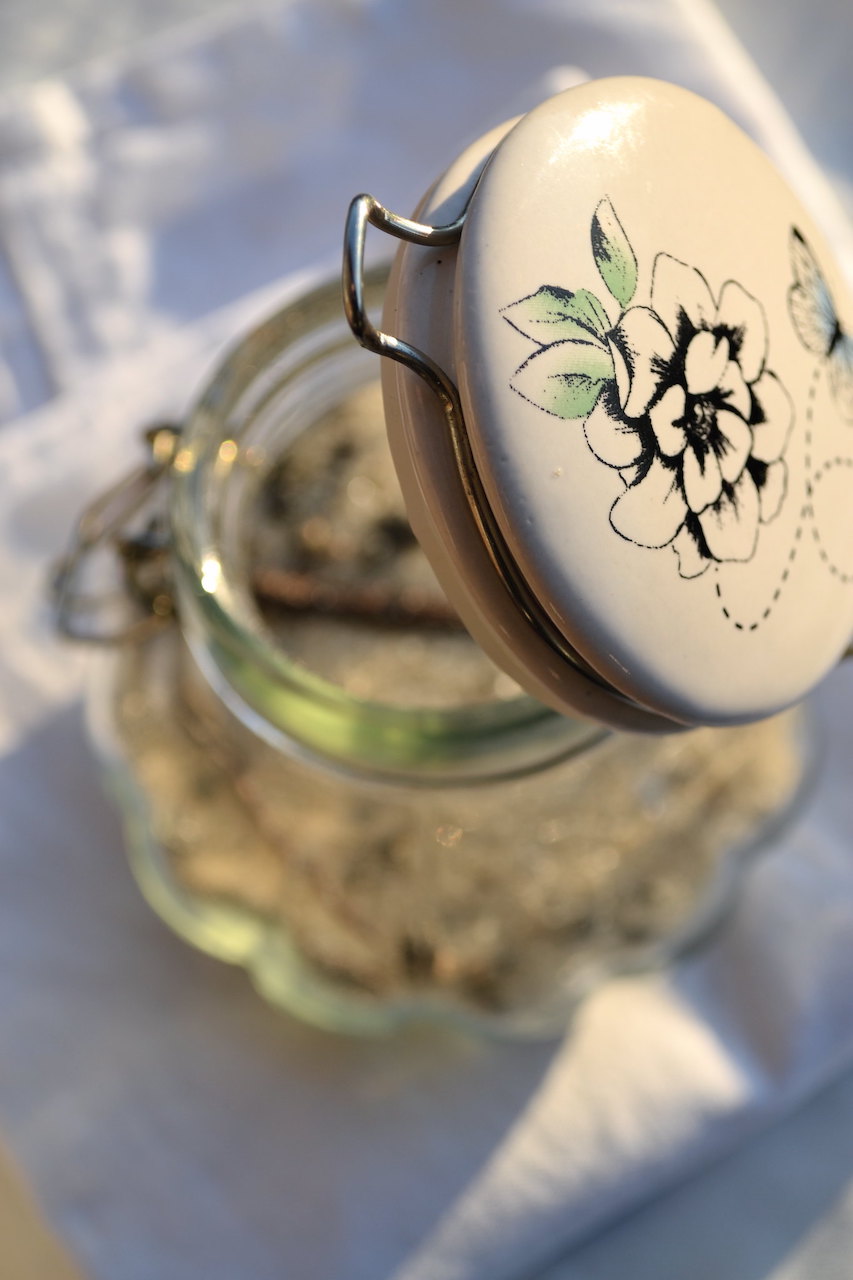
Home-made vanilla sugar in a glass jar · Kitchen & Aroma

Wednesday 1 February 2012

apple and chocolate muffins


I put this simple recipe together last Sunday when preparing a late brunch for the family. Instead of using chocolate chips or cocoa powder I used organic chocolate hazelnut spread. I only buy organic ones; I never buy Nutella or such brands. You can also use my home-made version if you have it, just make sure it's at room temperature before you start. The chocolate hazelnut spread makes the tops a bit crunchy. The muffins of course taste good and they are not too sweet. If you are allergic to nuts you can use coconut oil instead of the chocolate hazelnut spread and add some cocoa powder or organic chocolate chips. If you use regular baking powder you'll only need one teaspoon.

APPLE AND CHOCOLATE MUFFINS

INGREDIENTS

  • 200 g spelt flour (1½ cup)
  • 2 teaspoons gluten free baking powder
  • ½ teaspoon fine sea salt
  • 1 large egg, free-range/organic
  • 100 g raw cane sugar (½ cup)
  • 3 tablespoons organic chocolate hazelnut spread
  • 2 red apples (not too big), peeled and grated coarsely

METHOD

  1. In a medium bowl, combine the spelt flour, baking powder and salt. Set aside
  2. In a large bowl, combine the egg and sugar
  3. Peel the apples and remove the seeds. Grate the apples using a coarse grater
  4. Add the grated apples and the chocolate hazelnut spread into the large bowl with the wet ingredients and mix with a spatula
  5. Add the dry ingredients and mix gently. Make sure not to stir, the texture of the dough should be light
  6. Lightly grease a silicon muffin pan with some coconut oil and fill each muffin cup about two-thirds to the rim (makes 12 muffins)
  7. Bake at 200°C/400°F/gas 6 for 23-27 minutes
  8. Remove the muffins from the oven and allow them to cool in the tins for about 5 minutes before transferring to a wire rack

Pin It button on image hover